
This post may contain affiliate links. Read our disclosure policy here.
Want to pack a grilled ham and cheese for school without ending up with soggy bread? Here, you’ll learn how to make this classic sandwich and pack it in a lunchbox so it stays as fresh as possible until lunchtime.

Grilled Ham and Cheese Sandwich
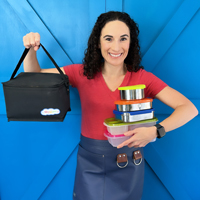
My daughter requested a ham and cheese sandwich daily for years, which is why I’ve created variations like the sub sandwich copycat and these roll-ups. Then, she became obsessed with it grilled, and I must admit that grilling it makes it so much better. Of course, it’s great to enjoy fresh, warm, and hot at home, but the trick is knowing how to pack it for school, even if it’s enjoyed at room temperature, so it stays crispy. I know you’re going to love it too.
How to Pack Grilled Ham and Cheese for School
- Make the sandwich
Butter one side of each slice of bread. Flip the bread over, add the cheese and ham to the unbuttered sides, and close the sandwich with the buttered sides facing out. - Grill and cool
Grill the sandwich in a skillet over medium heat for 2 to 3 minutes, until golden. Flip and cook for another 1 to 2 minutes, until the bread is crispy and the cheese has melted. Let it cool completely before packing. - Pack it for lunch
Place the cooled sandwich inside a sturdy lunch container so it doesn’t get squished. Pack fruit, veggies, and other moist sides in separate compartments, then refrigerate until you’re ready to place it inside an insulated lunch bag with an ice pack, if needed.

Laura’s School Lunch Packing Tips
Let the sandwich cool completely before closing it inside a lunch container. A hot grilled sandwich releases steam, and trapping that moisture inside the container softens the toasted bread.
You can pack a grilled ham and cheese for school, but I don’t recommend putting it in the lunchbox while it’s still hot, because steam will build up inside and make the bread soggy, and it won’t be hot even if you pack it in a thermos.
Yes. Let the sandwich cool completely before packing it in a sturdy lunch container and refrigerating it overnight. The bread will taste buttery and toasty but won’t be quite as crispy as it is straight from the skillet. Cooling it first helps it hold up much better for lunch.
Cheddar is my go-to, but Swiss, Provolone, Gouda, or Monterey Jack all melt well with ham. Use whichever cheese you like best in a ham and cheese sandwich.
Spinach and tomato are delicious additions, and you can also add bacon and turn it into a grilled club. If you’re packing the sandwich for school, go light on wet ingredients like tomato so they don’t add too much moisture to the bread.
Stop Wondering What to Pack.
Pack lunches your kids will actually eat with 101 lunch ideas, practical packing tips, a complete Thermos Lunch Guide, and my Pack Meals Like a Pro bonus.

More Ways to Make Lunch Easier
If grilled sandwiches are a favorite, here are a few more ways to make them work for school lunch:
Grilled Ham and Cheese Sandwich for Lunch

Watch How It’s Made:
Ingredients
- 2 slices of sandwich bread
- 2 teaspoons butter, for grilling
- 2 slices Cheddar cheese
- 1 ounce deli ham
Instructions
Make the sandwich
- Place the bread on a flat surface and butter one side of each slice. Flip the bread over and place one slice of cheese on each unbuttered side. Add the ham and close the sandwich with the buttered sides facing out.
Grill
- Heat a skillet over medium heat. Grill the sandwich for 2 to 3 minutes, until golden. Flip and cook for another 1 to 2 minutes, until the bread is crispy and the cheese has melted.
Pack for Lunch
- Serve immediately or let the sandwich cool completely before packing it inside a sturdy lunch container. Keep fruit, veggies, and other moist sides in separate compartments. Refrigerate until ready to place inside an insulated lunch bag with an ice pack, if needed.





JL says
Hi,
Do you use ice packs to keep meats and cheese safe until lunch time?
Thanks!
Laura Fuentes says
With grilled sandwiches, since most of the food has been cooked I don’t always add an ice pack for the sandwich itself but usually to keep the other ingredients I packed on the side cool -like, nobody wants warm ranch dip, you know? You might find this post that outlines how to and when to use ice packs helpful.
Jenny says
Grilled ham and cheese is a favorite at my house so I made this lunch many times for school. Now… all these tips are soooo useful! I mean, no more soggy bread!
Samantha G. says
Omg new school lunch fav alert. I like to do the bread extra crispy so that it stays that way until Claire is ready to eat and she really likes it!
Betty says
As a grilled cheese enthusiast, this recipe is top tier. I added jalapenos for added spice and it was perf.
Katie says
Simple and delicious! Thank you!