
This post may contain affiliate links. Read our disclosure policy here.
Learn all the hacks to pack these mini quiches properly and build an epic school lunchbox!

Cheese & Salsa Mini Quiches for the Lunchbox
How often have you made yet another same old sandwich, wishing more creative lunch ideas didn't take a lot of time? These easy Lunchbox Mini Quiches are the answer!
This simple recipe is made with basic staples like cheese, eggs, milk, and salsa, and it takes a couple of minutes to prepare. Just like like that, you have a high-protein school lunch that fills bellies and taste SO good!
Plus, this one-bowl wonder can be made the night before (or two!) and packed in a lunch box with fruit, veggies, and your favorite sides in a snap!
Should Mini Quiches be Eaten Warm, Cold or at Room Temperature
There’s no right or wrong temperature to enjoy these mini quiches. They can be eaten cold straight out of the fridge, at room temperature when packed in a lunchbox, or warm from a thermos container.
Lunchbox Mini Quiches Ingredients
Open the fridge and I know you’ll find it all! This is one of those epic recipes you can prep with ingredients we always have on hand. Check the list:
- Eggs: help to bind the ingredients while adding protein.
- Milk: use dairy or non-dairy milk.
- Salsa: store-bought or homemade salsa.
- Shredded cheese: Mozzarella, Colby Jack, Mexican cheese blend, pepper Jack, Swiss, or any variety of Cheddar.
- Salt & pepper: the classics, for seasoning.
You'll find the measurements in the recipe card below.
How to Make Cheese & Salsa Lunchbox Mini Quiches
Whisk everything in a bowl, fill the muffin pan, bake, and voilá! You get lunchbox mini quiches with delicious cheese and salsa in every bite. Kids will love them… and you too! Here’s the easy step-by-step:
- Prep the oven
Preheat the oven to 350F and grease a 24-count mini muffin pan. If using a regular muffin pan, cooking time will vary. - Combine
In a large bowl, whisk the eggs, milk, and salsa. Add cheese, salt, and pepper and whisk to combine. - Fill the muffin pan
Distribute the egg mixture evenly into the muffin pan cups, filling them about ¾ of the way up. - Bake
Bake in the preheated oven for 15-18 minutes (or 26-28 minutes if using a 12-count muffin pan). Remove the pan from the oven and let them cool in the pan before carefully removing them with a small knife or small spatula. - Refrigerate
Once cooled, refrigerate the egg cups in an airtight container or zip bag for up to 3 days.
Check out this quick video to see how they are made:
How to Store Mini Quiches
Once these lunchbox mini quiches are out of the oven and have cooled down to room temperature, remove them from the mini muffin tray and transfer them inside an airtight container or zip bag. Refrigerate for up to 3 days.
How long can Mini Quiches keep in the Fridge?
Mini quiches are the perfect lunch builder ingredient you can cook ahead of time to add to the lunchbox. They keep in the fridge for 3 days.
How to Pack Mini Quiches in a Thermos
To enjoy mini quiches warm at lunch, you’ll need to heat them up and place them inside a thermos container. While they won’t be as hot as out of the oven or microwave, they’ll remain warm.
How to Pack Lunchbox Mini Quiches
These mini quiches can be packed in the lunchbox to enjoy them cold or at room temperature, or in a thermos container to eat them warm. Here’s how to do both:
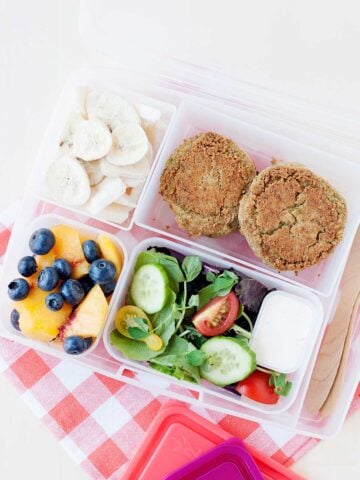
- To enjoy these at room temperature, place 4 to 6 mini quiches inside the main compartment of a lunch container.
- To eat warm, heat the mini quiches in the microwave for 1 minute, stopping the microwave halfway through to flip them over. Immediately transfer them inside a thermos container and close the lid.
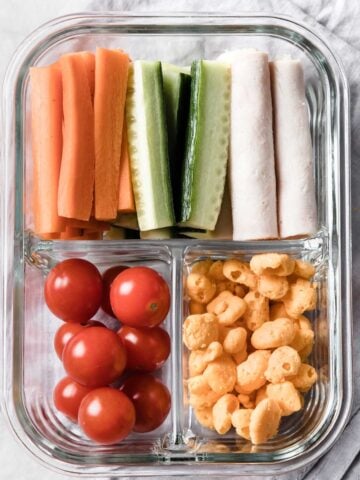
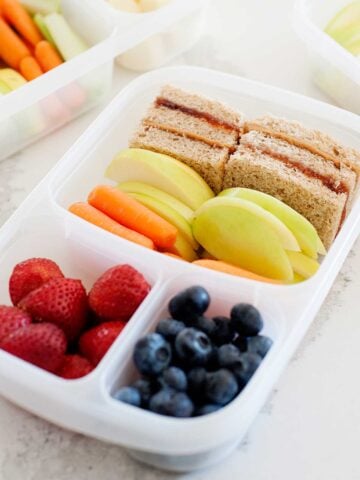
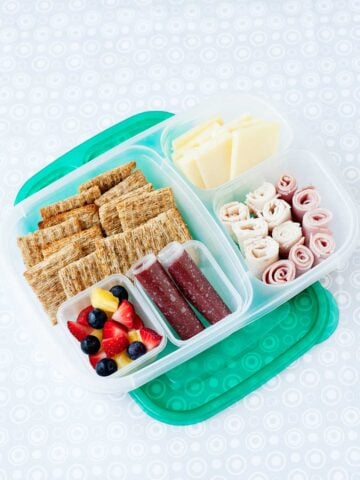
- Finish packing this lunch by adding fruit, veggies, and any other lunch sides inside a bento box. Pack everything inside a lunch bag.
Tips to Pack Lunchbox Mini Quiches
Follow these tips to pack a school lunch that kids will devour:
Make it a lunch
Turn these lunchbox mini quiches into a complete and satisfying meal by adding fruits, veggies, nuts, olives, rolled deli meat, healthy snacks, or homemade desserts. The possibilities are endless!
Separate wet from dry ingredients
If you pack the mini quiches with crunchy snacks like crackers or chips, place them in a different compartment or container to keep them from absorbing the moisture.
Meal prep
These mini quiches solve lunches, so you’ll want to save yourself some time by cooking them in bulk. You can also use leftovers and bake pizza egg cups or spinach bacon mini quiches. They keep in the fridge for up to 3 days.
Keep it chilled
If you want to enjoy the mini quiches cool, place them in a bento box and pack them with an insulated lunch bag. Use an ice pack to keep the temperature inside the lunch bag cool.
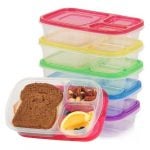
Related: Top 5 Lunchboxes We’ve Tested
Cheese & Salsa Lunchbox Mini Quiches: Recipe + Video

Ingredients
For the mini quiches:
- 6 eggs
- 3 tablespoons milk
- ½ cup salsa
- 1 cup cheddar, shredded
- ¼ teaspoon salt
- ¼ teaspoon pepper
For each lunch:
- 4-6 mini quiches
- Fruits & veggies
- Lunch sides
Instructions
For the mini quiches:
- Preheat the oven to 350F and grease a 24-count mini muffin pan. See the note below regarding cooking time if using a regular muffin pan.
- In a large bowl, whisk the eggs, milk, and salsa. Add cheese, salt, and pepper and whisk to combine.
- Distribute the egg mixture evenly into the muffin pan cups, filling them about ¾ of the way up.
- Bake in the preheated oven for 15-18 minutes. Remove the pan from the oven and let them cool in the pan before carefully removing them with a small knife or small spatula.
- Once cooled, refrigerate the egg cups in an airtight container or zip bag for up to 3 days.
For lunch:
- To enjoy these at room temperature, place 4 to 6 mini quiches inside the main compartment of a lunch container.
- To eat warm, heat the mini quiches in the microwave for 1 minute, stopping the microwave half way through to flip them over. Immediately transfer them inside a thermos container and close the lid.
- Finish packing this lunch by adding fruit, veggies, and any other sides inside a bento box. Pack everything inside a lunch bag.


Allison K says
Do you happen to have another source for the recipe? That website is not working it seems
MOMables-Laura says
Hi Allison, the recipe has been updated and should be working.
latesha says
HI!
My daughter loves mini quiches, but she only likes the ones with bisquick in the recipe. Do you have a healthy bisquick recipe (possibly one with whole wheat) or do you know of a healthy bisquick that can be purchased. The heart healthy one doesnt seem to be much better.
MOMables says
Bisquick is flour + baking powder essentially. You can add 1/4 cup of flour + 1/2 teaspoon baking powder to this recipe to yield a thicker quiche. enjoy!
Christy Zachar says
Do you eat these cold? I was looking to pack healthy items in my son’s lunch box.
MOMables-Laura says
Hey Christy, you can enjoy them hot by packing them in a warmed thermos, or at room temperature by packing them in a regular lunchbox.