
This post may contain affiliate links. Read our disclosure policy here.
Below, you’ll learn how to make this pressed-to-perfection ham and cheese panini and how to pack it to keep it crunchy and fresh until lunchtime.
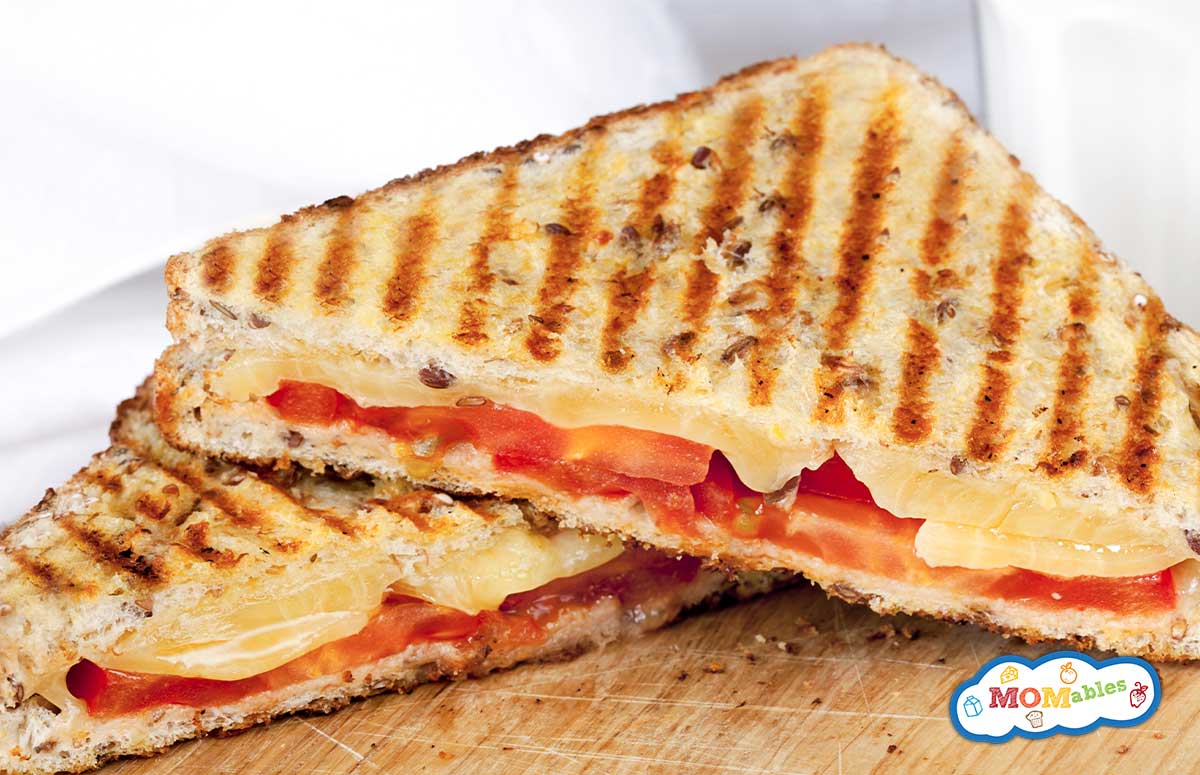
Ham Panini
A few years ago, my daughter and I shared an AMAZING ham panini at a cozy local spot. We were totally won over by its crisped edges and gooey center! And guess what? It’s super easy to recreate and make into an epic school lunch.
If you love giving the classic ham and cheese combo and upgrade, you’ll also want to check out these ham and cheese apple wraps and hawaiian sliders! Perfect for using up extra ham, and no one will complain about these leftovers, trust me!
Ingredients
All you need for this toasty, melty ham and cheese panini are a few simple ingredients. Here’s a rundown of what I put in mine:
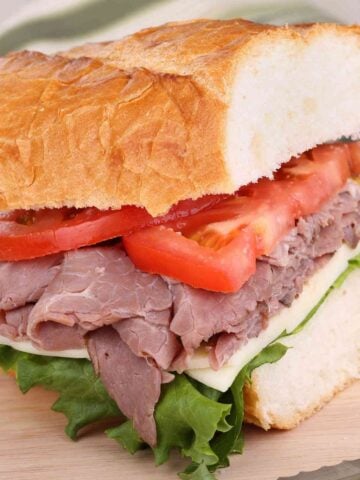
- Bread: I recommend a sturdy, hearty bread like sourdough or ciabatta.
- Ham: thin slices work best! Use up leftover holiday ham or grab some from the deli.
- Cheese: Swiss is my top pick for that perfect melt and nutty flavor, but you can mix it up with cheddar, provolone or any other favorite.
- Tomato: sliced thin so they don’t fall out when you press while grilling. Removing the seeds first will keep them from being too wet and help prevent a soggy sandwich.
- Mayo or mustard: I love mayo on just about everything, but dijon give this panini and amazing kick. Why not add both? Or switch things up with homemade pesto.
- Butter: for grilling.

How to Make a Ham and Cheese Panini
If you don’t have a panini maker, don’t worry. (I actually use my old George Foreman grill, which works pretty great) A regular grill pan or skillet will also do the job.
- Heat Skillet
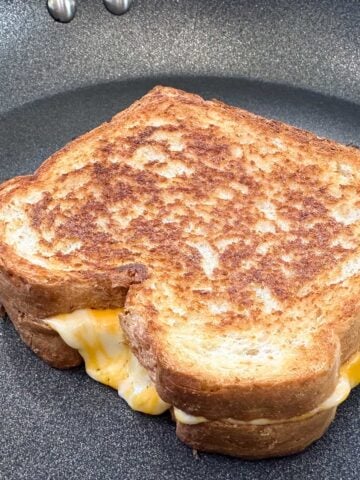
Make sure your panini press or skillet is hot. - Assemble sandwich and grill
Spread mayo or mustard on each slice of bread and then layer on the ham, tomato and cheese. Spread butter on the outside of the sandwich, and press it down until golden. Pressing it firmly is the trick to give it that crispy crust. - Adding greens
If you are adding lettuce or other leafy greens, wait until after the panini is cooked and has cooled down before tucking them inside. - Pack it for school
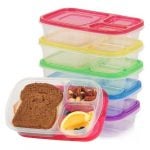
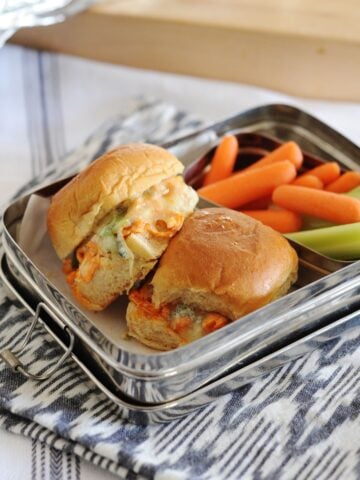
The ham and cheese panini should be completely cooled before slicing it in half and packing it inside a hard lunch container. This will prevent moisture from building up and keep it crispy even at room temperature. Keep healthy lunch sides separate.
Keeping it Fresh for Lunch at School
Here are some helpful tips to keep this sandwich at peak panini awesomeness until it’s time to devour!
Use the right container
Now that we have this epic sandwich, we don’t want it to get squished! Pack it in a hard, sandwich-sized container to keep it intact in the lunch bag or backpack.
Keep it chilled
If you are adding fresh fruit and veggies to round out this lunch, add an ice pack to keep them fresh until it's time to eat.
Let it cool
Let the panini cool completely before packing it so moisture doesn’t build up and make the bread soggy!
Layer correctly
Place the ham and cheese on the bread slices first before adding wetter ingredients like tomatoes. This will create a barrier to prevent moisture from reaching the bread.
Add a dip
If you haven’t tried dipping a panini in some delicious ranch or marinara sauce, hear me out. It’s like bringing the cafe to the school cafeteria! Just make sure to put it in a small leak-proof container and pack it separately to prevent spills.
What to Pack with a Ham and Cheese Panini for Lunch
Round out this ham and cheese panini with deli-style sides that pack well, like zucchini chips or homemade potato chips. Don’t forget a sweet treat like mini cinnamon pretzels or no-bake chocolate brownie bites to bring that bistro vibe to the lunchbox!
Ham and Cheese Panini

Ingredients
- 2 slices of thick bread
- 3 ham slices
- 2 slices Swiss cheese
- 2 Tomato slices
- 1 tablespoon mayo or dijon mustard
Instructions
Grill sandwich:
- Spread butter on the outside of assembled sandwich. grill for about 2 to 3 minutes until it's golden and the cheese has begun to melt. If not using a press, flip the sandwich and grill on the other side for another minute or 2 until it's golden and crispy.
- Serve immediately or let sandwich cool completely before cutting it in half and packing it into a hard lunch container.
Pack for School
- Place lunch container in an insulated lunch bag and keep any sides that need to be chilled separate with an ice pack, until ready for school.

Holly says
Delicious lunch recipe!!
Vic says
This ham and cheese panini is so simple yet incredibly delicious! The crispy bread and melted cheese make it the perfect comfort meal. Thanks for sharing this tasty recipe!
Gwen says
My daughter loved getting this panini in her lunchbox today! She said her friends were all jealous, I call that one a school lunch win!